Outdoor Faucet Fixes: A Simple Guide
IMPORTANT NOTE: . Our company is located in British Columbia, Canada. If you are reading this article in another location, we hope you enjoy the information, but unfortunately we cannot service you.

Table of Contents
ToggleWhy a Dripping Outdoor Faucet Demands Your Attention
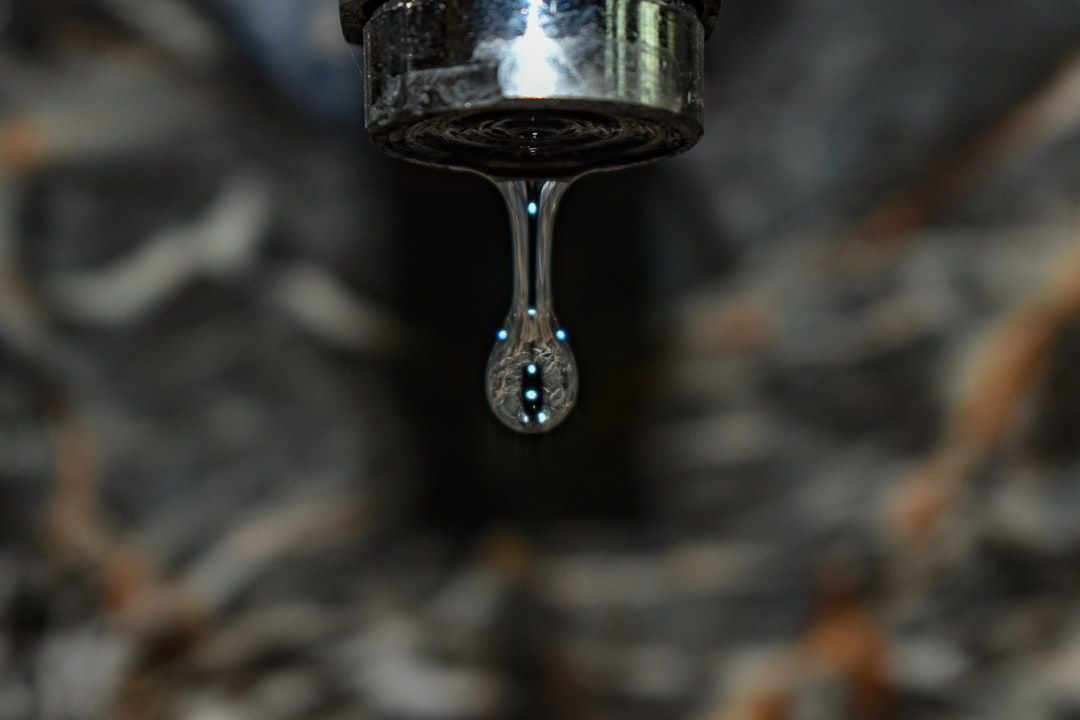
Outdoor faucet repair is one of the most common DIY plumbing tasks homeowners face, yet many people ignore that steady drip until it becomes a bigger problem. Whether you call it a spigot, hose bib, or outdoor tap, a leaking faucet can waste thousands of gallons of water and cause serious damage to your home’s foundation.
Quick outdoor faucet repair solutions:
- Tighten the packing nut – Use an adjustable wrench to give it a 1/8 to 1/4 turn
- Replace the washer – Remove the stem and swap out the worn rubber washer
- Fix the vacuum breaker – Pop off the cap and replace damaged parts on frost-free faucets
- Check loose connections – Ensure all fittings are properly tightened
The good news? Most outdoor faucet problems have simple fixes that take less than 30 minutes. The research shows that a single leaky outdoor faucet can waste 5 gallons of water daily – that’s 1,851 gallons per year from just one dripping tap.
A leaky faucet might seem like a minor annoyance, but it can lead to:
- Higher water bills
- Foundation damage from pooling water
- Soil erosion around your home
- Pest problems from standing water
- Mold and mildew growth
Most leaks happen at three main spots: the spout (when the faucet is off), the handle (when it’s turned on), or the vacuum breaker cap on frost-free models. Each has a different cause and solution.
Diagnosing the Drip: Finding the Source of the Leak
Before we dive into the nitty-gritty of outdoor faucet repair, let’s play detective. Pinpointing exactly where the leak is coming from is the first crucial step in solving the mystery. Outdoor faucets, also known as hose bibs or spigots, are built to last, but like anything, parts can wear out over time. Understanding the common leak points will help you diagnose the issue and determine the best course of action.
Leaks can manifest in several ways: a steady drip from the spout, water seeping from around the handle, a trickle from the base where the faucet meets the house, or even a leak that only appears when a hose is connected. Each of these scenarios points to a different underlying problem, often involving a worn washer, a loose packing nut, or a faulty O-ring. Let’s explore these common culprits.
Leaking from the Spout
If your outdoor faucet is constantly dripping from the spout, even when it’s completely turned off, the most likely culprit is a worn-out stem washer or a damaged valve seat. The stem washer, typically made of rubber, is designed to create a watertight seal when the faucet is closed. Over time, this washer can become hardened, cracked, or simply compressed, losing its ability to seal effectively. When this happens, water continues to seep past, resulting in that annoying drip.
The valve seat, which the washer presses against, can also become corroded or pitted, preventing a perfect seal. If you’ve replaced the washer and the leak persists, the valve seat might be the problem. Addressing a spout leak promptly is important, as even a slow drip can waste a significant amount of water and lead to higher utility bills.
Leaking from the Handle
A leak around the handle of your outdoor faucet, especially when the water is turned on, usually indicates an issue with the packing nut or the packing washer (also known as stem packing). The packing nut is located just behind the handle, and it compresses a small washer or string-like packing material around the faucet’s stem. This packing creates a seal that prevents water from escaping along the stem when the handle is turned.
If this nut loosens over time, or if the packing material itself wears out, water can easily leak from around the handle. Often, a simple tightening of the packing nut can resolve this issue. If tightening doesn’t work, it means the packing material itself needs to be replaced. This type of leak is often less about water waste and more about inconvenience, but it’s still a sign that maintenance is due.
Leaking from the Vacuum Breaker (Frost-Free Faucets)
If you have a frost-free outdoor faucet, you might encounter a leak from the vacuum breaker, which is typically located on top of the faucet assembly. Frost-free faucets, also known as anti-siphon faucets, are designed to prevent water from freezing inside the pipe by moving the shut-off valve deeper into your home’s heated space. The vacuum breaker is an essential anti-siphon device that prevents contaminated outdoor water from being siphoned back into your home’s potable water supply.
If water is dribbling from the vacuum breaker cap when the faucet is in use, or even when it’s off, it indicates a problem with the internal components of the vacuum breaker. This could be due to a worn diaphragm or spring inside the assembly. While replacing a vacuum breaker is often straightforward, it’s a specific repair unique to frost-free models and requires understanding its function to prevent backflow contamination.
Essential Tools and First Steps for Your Outdoor Faucet Repair
Ready to tackle your outdoor faucet repair? Let’s get you set up for success! Having the right tools within arm’s reach makes all the difference between a smooth repair and multiple frustrating trips to the hardware store. Plus, we’ll walk you through the most important step that many DIYers skip – properly shutting off the water supply.
Your adjustable wrench will be your best friend for this job, perfect for gripping and turning the packing nut and other fittings. Slip-joint pliers come in handy for those tricky spots where your wrench can’t quite reach. You’ll also want both Phillips and flathead screwdrivers ready for removing handle screws and accessing the faucet’s internal components.
The real heroes of any faucet repair are the replacement washers. Pick up an assortment pack of rubber washers in different sizes – trust us, having extras on hand is worth it. If your faucet uses O-rings, grab a variety pack of those too. Teflon tape is essential for wrapping threaded connections to prevent future leaks, while plumber’s grease keeps everything moving smoothly and helps your new parts last longer.
Don’t forget the practical stuff: a bucket or some towels to catch water when you open things up, and a wire brush for cleaning any corrosion you might find on the valve seat. These simple preparations will save you time and keep your workspace tidy.
While you’re thinking about outdoor plumbing maintenance, it’s also smart to prepare for seasonal changes. Check out our guide on How to Prevent Frozen Pipes – a little prevention now can save you from much bigger headaches later!
Turning Off the Water Supply
Here’s the golden rule that separates successful DIY repairs from indoor water disasters: always shut off the water before you start. This step isn’t optional, and skipping it will turn your simple repair into a much bigger problem.
Start by locating the main shut-off valve for your home. You’ll typically find this where the main water line enters your house – check your basement, utility room, crawl space, or near your water meter. Look for either a gate valve with a round handle that turns like a traditional spigot, or a ball valve with a lever handle.
Turning clockwise to close is the standard for most valves. If you have a gate valve, turn the handle clockwise until it’s snug, but don’t force it – older valves can break if you’re too aggressive. For ball valves, simply turn the lever a quarter-turn until it’s perpendicular to the pipe.
Some lucky homeowners have dedicated faucet valves that control just the outdoor spigot. These are usually located inside the house on the pipe leading to your exterior faucet. If you have one of these, you can use it instead of shutting off your whole house – much more convenient!
Once the water is off, drain the residual water by opening the outdoor faucet you’re repairing and any indoor faucets on your home’s lowest level. This relieves pressure in the system and prevents surprise water gushes when you start taking things apart. You’ll know everything’s properly drained when the water stops flowing completely.
With the water safely shut off and drained, you’re ready to dive into the actual repair with confidence!
A Step-by-Step Guide to Outdoor Faucet Repair
Now that we’ve diagnosed the leak and gathered our tools, it’s time to roll up our sleeves and get to work. Most outdoor faucet repair jobs are surprisingly straightforward – they just need a methodical approach and a little patience. Think of it like following a recipe: take your time, follow the steps, and you’ll be amazed at what you can accomplish.
Before we dive in, let’s get familiar with your faucet’s anatomy. The main players are the faucet handle (what you turn), the packing nut (right behind the handle), the faucet stem (the long rod inside), the washer assembly (at the tip of the stem), and the retaining screw (holding everything together). Once you know these parts, the repair process becomes much clearer.
The Quick Fix: Tightening a Packing Nut
Sometimes the simplest solutions are the most effective. If water is seeping around your faucet handle – especially when it’s turned on – you might be able to solve the problem without taking anything apart. This is the “try this first” approach that could save you time and effort.
The culprit is usually the packing nut, which sits right behind the handle where the stem enters the faucet body. Over time, this nut can work itself loose, allowing water to escape around the handle. The fix? A gentle tightening with your trusty adjustable wrench.
Here’s the key: less is more. Fit your wrench snugly on the packing nut and give it just a small turn clockwise – about 1/8 to 1/4 of a turn. You’re trying to compress the packing material inside just enough to stop the leak. Think of it like tightening a jar lid: snug, but not so tight that you strip the threads.
After your gentle adjustment, turn the main water supply back on and test the faucet. If the leak stops, congratulations! You’ve completed the easiest outdoor faucet repair in the book. If water is still seeping out, try another slight turn. But if the leak persists after a couple of attempts, the packing material inside has probably worn out and needs replacement.
Replacing the Washer Assembly: A Common Outdoor Faucet Repair
When your outdoor faucet drips constantly from the spout – even when it’s completely shut off – you’re looking at a classic washer problem. This is probably the most common outdoor faucet repair homeowners encounter, and while it involves a bit more work than tightening a nut, it’s still very doable for most people.
The rubber washer at the end of your faucet stem creates the watertight seal when you turn off the faucet. Over time, this little rubber hero gets compressed, cracked, or simply worn out. When that happens, water finds its way past and creates that annoying drip.
Start by double-checking that your water supply is completely shut off and the faucet has been drained. Then locate the handle screw – it’s usually on top of the handle or sometimes on the front. Remove this screw with your screwdriver and gently pull the handle straight off. If it’s being stubborn, a little wiggle usually helps, but don’t force it.
Next comes the packing nut. Using your adjustable wrench, turn this nut counter-clockwise to loosen it. Once it’s loose enough, you can pull the entire faucet stem straight out of the faucet body. This is the long rod that connects the handle to the business end of the faucet.
Here’s where the magic happens. At the very tip of the faucet stem, you’ll find a small screw holding a rubber washer in place. Remove this screw, take off the old washer, and replace it with a new one that’s exactly the same size and thickness. Pro tip: apply a thin layer of plumber’s grease to the new washer – it helps create a better seal and makes the washer last longer.
While you’re at it, check for any O-rings further up the stem. If they look worn or cracked, replace them too. It’s like changing your car’s oil filter when you change the oil – might as well do it all while you’re in there.
Reassembly is just the reverse process. Slide the stem back into the faucet body, hand-tighten the packing nut (then give it a slight turn with your wrench – remember, snug but not overtight), replace the handle, and secure it with its screw.
When you restore the water supply, do it slowly and watch for any leaks around the handle or from the spout. If everything looks good, pat yourself on the back – you’ve successfully completed your outdoor faucet repair! If you’re more of a visual learner, you can watch this step-by-step video to learn how to fix a leaky outdoor faucet.
Special Considerations for Frost-Free Outdoor Faucet Repair
Frost-free faucets are engineering marvels that prevent your pipes from turning into ice sculptures during cold snaps. But their clever design means they need special attention when it comes to repairs. If you live in an area where temperatures drop below freezing, you probably have one of these protective devices.
The main difference is the long stem design. While a regular faucet has its shut-off valve right at the exterior wall, frost-free faucets have much longer stems that reach several inches inside your heated home. The actual valve sits inside the wall where it stays warm, and when you turn off the faucet, water drains out of the exposed portion of pipe, preventing freeze damage.
When you’re replacing the washer on a frost-free faucet, you’ll follow the same basic steps, but don’t be surprised when you pull out that stem – it’s going to be much longer than you expected. The washer is still at the far end, but you might need to work in a more confined space to access it.
The other unique feature is the vacuum breaker (also called an anti-siphon device) that sits on top of the faucet. This clever gadget prevents contaminated outdoor water from being sucked back into your home’s drinking water supply. If water is dribbling from the vacuum breaker cap, you’ll need to address this specific component.
The vacuum breaker cap usually unscrews or pops off, revealing a rubber diaphragm, a spring, and sometimes a plastic disc inside. These parts can wear out over time. Carefully remove the old components, noting their order for reassembly. You can often find a vacuum breaker replacement kit specific to your faucet brand, or sometimes it’s easier to replace the entire assembly.
Working with frost-free faucets requires a bit more patience due to their internal valve location and the presence of the anti-siphon device. Always make sure you’re using compatible replacement parts for your specific model – frost-free faucets aren’t all created equal, and using the wrong parts can compromise their freeze protection.
Repair or Replace? Knowing When to Call for Help
We’ve covered the common fixes, but sometimes even the most enthusiastic DIYer needs to face reality. Not every outdoor faucet repair is a simple weekend project, and knowing when to wave the white flag can actually save you time, money, and a whole lot of headaches down the road.
The decision between repairing and replacing often comes down to the extent of the damage and the age of your faucet. A brand-new faucet with a simple washer problem? That’s an easy repair. But a 20-year-old faucet that’s been through countless freeze-thaw cycles and looks like it’s seen better days? That might be telling you it’s time for retirement.
Severe corrosion is often the first red flag that repair isn’t going to cut it. If your faucet looks like it’s been living underwater for decades, with rust eating through the metal body, no amount of washer replacement is going to solve the underlying problem. Corroded threads make it nearly impossible to get a proper seal, and you’ll likely find yourself back at square one within weeks.
Cracks in the faucet body are another clear sign that replacement is your best bet. These structural failures can’t be patched or sealed reliably, and they often indicate that the metal has become brittle from age and weather exposure. A cracked faucet body is like trying to fix a broken bone with a band-aid – it’s just not going to hold.
Persistent leaks after you’ve tried all the standard repairs can be incredibly frustrating. You’ve replaced the washer, tightened the packing nut, even cleaned the valve seat, but water still finds a way to escape. This often points to multiple worn components or internal damage that makes repair more expensive than replacement.
Stripped threads present a particularly tricky challenge. When the threads that hold everything together have worn smooth, you lose the ability to create tight, secure connections. This can happen on the handle threads, the packing nut threads, or even the connection where the faucet meets the pipe inside your wall.
The line between DIY and professional help often depends on your comfort level and the complexity of the job. Simple washer replacements and packing nut adjustments are well within most homeowners’ capabilities. However, if you need to replace the entire faucet assembly – especially on frost-free models where the connection might be deep inside your wall – that’s when professional expertise becomes valuable.
Professional plumbers bring more than just tools to the job. They can quickly diagnose problems that might take you hours to figure out, they have access to professional-grade parts and materials, and they can spot potential issues before they become expensive problems. Plus, their work typically comes with warranties that protect your investment.
When you’re dealing with plumbing that connects to your home’s main water system, there’s also the peace of mind that comes with knowing the job is done right. A poorly installed outdoor faucet can lead to leaks inside your walls, which can cause thousands of dollars in damage before you even notice there’s a problem.
The complexity of your specific situation also matters. If your outdoor faucet is connected to your home’s main plumbing in an unusual way, or if you find additional problems once you start taking things apart, what started as a simple repair can quickly become a major project requiring permits and specialized knowledge.
For homeowners in the Mission area dealing with complex replacements or those persistent leaks that just won’t quit, the experienced team at Rep-Air Heating And Cooling understands the unique challenges that British Columbia’s climate can present to outdoor plumbing. They can ensure your new faucet is properly installed and winterized for years of reliable service. Learn more about their Plumbing Services in Mission.
Sometimes the smartest DIY decision is knowing when to call in the professionals. There’s no shame in recognizing that some jobs are better left to those who do them every day, and the investment in professional installation often pays for itself in avoided headaches and guaranteed results. Understanding the Professional Plumbing Service Benefits can help you make an informed decision about when to tackle a project yourself and when to bring in the experts.
Repair or Replace? Knowing When to Call for Help
We’ve covered the common fixes, but sometimes, a simple repair just won’t cut it. How do you know when it’s time to throw in the towel on DIY and consider replacing the entire outdoor faucet, or even calling in the professionals? This is a common dilemma, and knowing when to make the call can save you time, money, and a lot of frustration.
The truth is, not every outdoor faucet repair situation has a happy DIY ending. Sometimes the damage goes beyond what a simple washer replacement can fix, and that’s perfectly okay. Learning to recognize these situations early can prevent you from spending hours wrestling with a faucet that’s destined for the recycling bin.
Here’s a quick guide to help you decide between repair and replacement:
| Symptom | Likely Cause | Recommended Action (Repair/Replace) |
|---|---|---|
| Constant dripping after washer replacement | Worn or damaged valve seat | Repair – Resurface valve seat or replace if severely damaged |
| Water leaking from handle area | Loose packing nut or worn packing | Repair – Tighten nut or replace packing material |
| Severe corrosion on faucet body | Age, weather exposure, poor water quality | Replace – Corrosion compromises structural integrity |
| Cracks in faucet body | Freezing damage, over-tightening, age | Replace – Cracks will only get worse over time |
| Persistent leaks after multiple repairs | Multiple worn components, poor fit | Replace – More cost-effective than repeated repairs |
| Stripped threads on spout or connections | Over-tightening, corrosion, wear | Replace – Stripped threads can’t be reliably repaired |
| Water pressure issues or irregular flow | Internal damage, mineral buildup | Evaluate – May need professional assessment |
Severe corrosion is often the biggest red flag. If your outdoor faucet looks like it’s been through a few too many Canadian winters and the metal is flaking, pitted, or green with corrosion, it’s time for a replacement. Corroded faucets are weak faucets, and they’re likely to fail again soon even if you manage a temporary fix.
Cracks in the faucet body are another clear sign that replacement is your best option. These usually happen from freeze damage or over-tightening during previous repairs. Even small cracks will grow over time, especially when water pressure and temperature changes stress the metal.
If you’ve already tried fixing the same faucet twice and it’s still giving you trouble, that’s the universe telling you it’s time for a new one. Persistent leaks after proper repairs usually mean multiple components are worn out, and you’ll end up spending more on parts and time than a new faucet would cost.
Stripped threads are particularly frustrating because they make it impossible to get a tight, leak-free connection. If the threads on your faucet spout or the connection points are damaged, don’t try to force things – you’ll only make it worse.
The DIY route works great for simple washer replacements and minor adjustments. But when you’re dealing with major corrosion, cracks, or complex internal damage, it’s often more economical to replace the entire unit. A professional can also spot potential issues with your plumbing that might have caused the original problem.
For complex replacements or persistent leaks in the Mission area, the professional plumbers at Rep-Air Heating And Cooling can ensure the job is done right. They understand the unique challenges of British Columbia’s climate and can recommend the best frost-free options for your home. Sometimes calling in the experts isn’t giving up – it’s making the smart choice to get Professional Plumbing Service Benefits that save you time and prevent future headaches.
There’s no shame in knowing your limits. A properly installed new faucet will serve you better than a repeatedly patched old one, and you’ll have peace of mind knowing it’s done right.
Request your service today!
Our team of highly trained technicians are standing by ready to help you out with all of your service, repair, and installation needs. You can count on us for on-time repairs, professional installation, and the friendliest customer service in town!Contact Rep-Air Heating & Cooling today to get started with service by requesting a quote online, or by phone at (844) 218-3362.
Request Service
Contact us today to request an estimate or schedule service.


