How to Check Your Thermostat Before Calling for Repair
Why Knowing How to Check Your Thermostat Before Calling for Repair Can Save You Time and Money
Knowing how to check your thermostat before calling for repair could be the difference between a quick five-minute fix and an unnecessary service call. In fact, roughly 25% of furnace repair calls turn out to be simple thermostat issues, not equipment failures. For homeowners in the Fraser Valley and across the Lower Mainland, that means a lot of wasted time and money on problems you could have solved yourself.
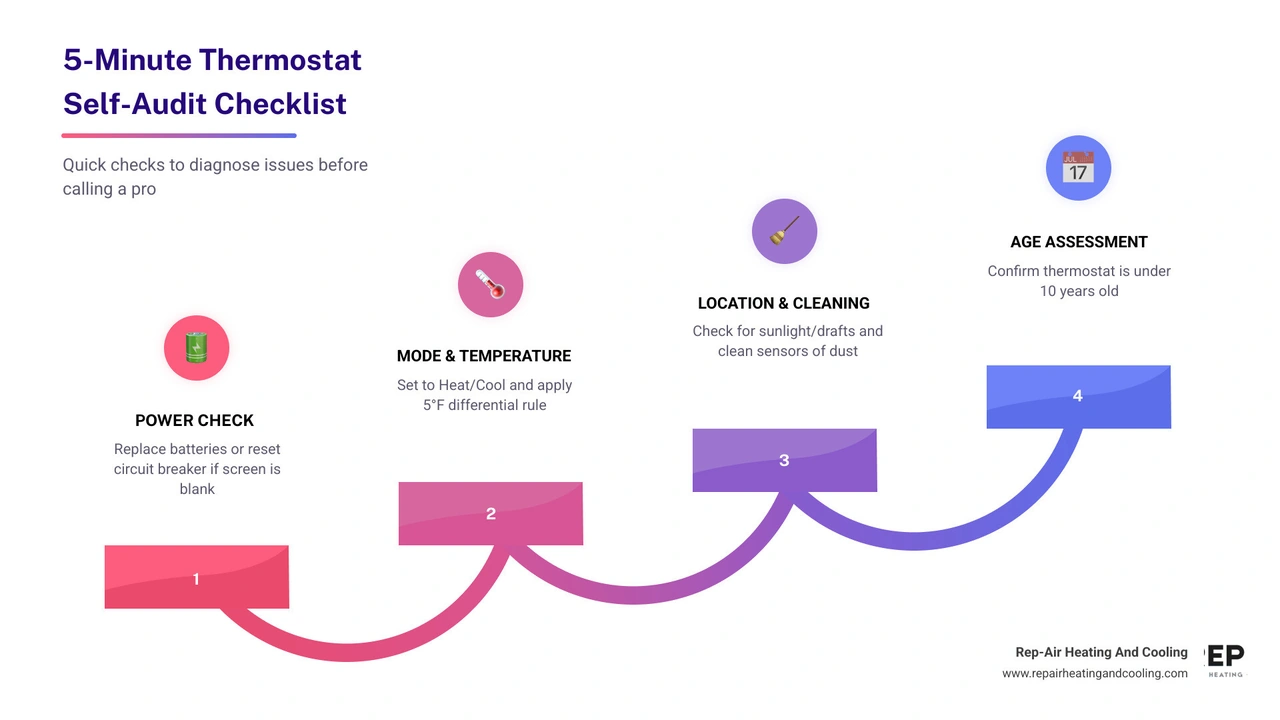
Before you pick up the phone, run through these quick checks:
1. Check the power - Replace batteries or reset the circuit breaker if the screen is blank
2. Verify the mode - Make sure the thermostat is set to Heat or Cool, not Fan Only or Off
3. Apply the 5-degree rule - Set the temperature at least 5°F above or below room temperature and wait for a response
4. Inspect the location - Make sure the thermostat isn't in direct sunlight or near a drafty window
5. Clean the sensors - Gently remove dust with a soft brush to prevent inaccurate readings
6. Check the age - Most thermostats last around 10 years; older units may simply need replacing
Most of these steps take just a few minutes and require no special tools. If your HVAC system still isn't responding after working through this list, that's when it makes sense to call in a professional from Rep-Air Heating And Cooling.
How to check your thermostat before calling for repair terms to remember:
• ac circuit breaker keeps tripping what it means
• ac troubleshooting tips before calling a pro
• why is my ac blowing warm air troubleshooting steps
Common Signs of a Malfunctioning Thermostat
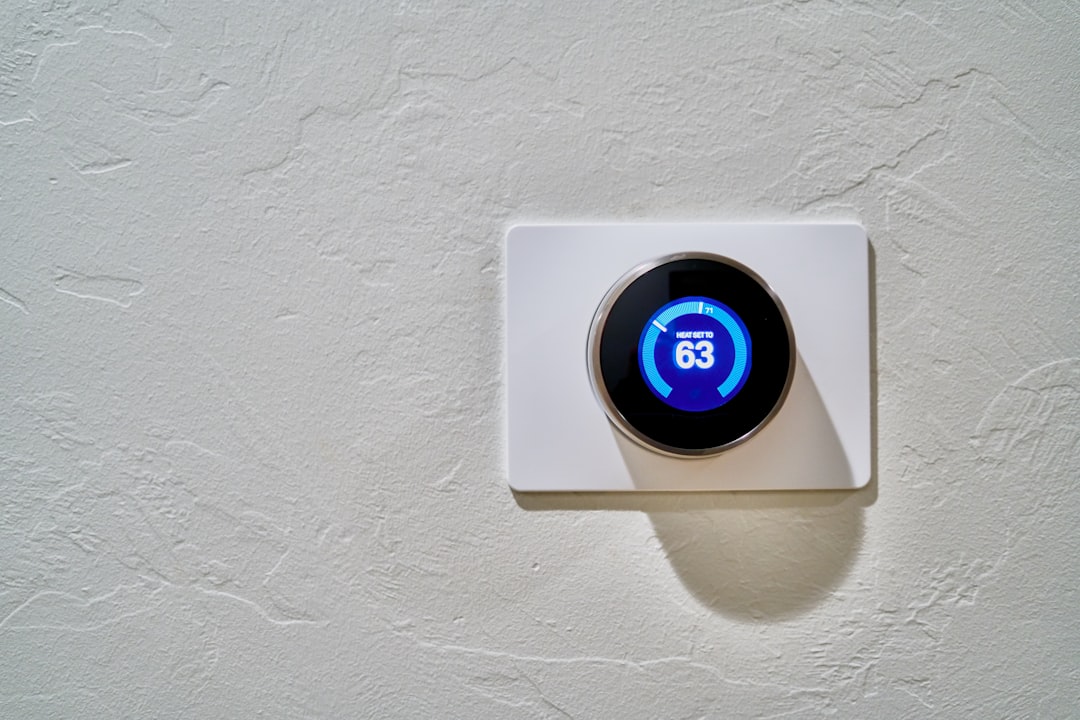
When your home starts feeling more like a backyard ice rink or a sweltering greenhouse, it is easy to assume your furnace or air conditioner has breathed its last. However, the true culprit is often the wall-mounted control center. Recognizing the warning signs of a failing thermostat can save you from unnecessary panic.
Here are the most common signs that your thermostat is malfunctioning:
• The Blank Screen: If your digital display is completely dark, flickering, or unresponsive, the thermostat cannot communicate with your heating and cooling equipment.
• Short-Cycling: Normal HVAC systems run in steady 15-minute cycles to reach your desired temperature. If your system is turning on and off rapidly, sometimes 10 to 15 times an hour, this short-cycling behavior puts massive wear and tear on your compressor and heat exchanger.
• The "Polar Parlor Effect" (Temperature Mismatch): This occurs when the thermostat reads a comfortable 21°C (70°F), but you are shivering in a room that feels closer to 15°C (59°F). When internal sensors drift, the thermostat loses its ability to gauge actual indoor temperatures.
• Unresponsive Controls: You press the buttons or slide the levers, but nothing happens. Sometimes you might hear a faint "click" from the thermostat, yet the heating or cooling equipment remains completely silent.
• High Electric Bills: A faulty thermostat can cause your system to run nonstop or get stuck in the "on" position. This continuous operation can cause you to end up with a high electric bill.
If you notice any of these red flags, it is highly recommended to run through some basic diagnostics. Keeping an eye out for these indicators is a key part of identifying when your system needs professional attention, which you can read more about in our guide on Signs Your HVAC System Needs Maintenance.
How to Check Your Thermostat Before Calling for Repair
Before you search for emergency HVAC services, let's look at the foundational power sources and safety switches that keep your thermostat operating. Many seemingly dead thermostats are simply starved of electricity.
First, check the physical power supply. If your thermostat relies on batteries, a set of dying cells will cause the screen to fade, flicker, or go completely blank. We recommend replacing the batteries annually, a great habit to build is changing them at the exact same time you swap out your smoke detector batteries.
Next, head to your home's main electrical panel. Look for the circuit breaker labeled "HVAC, " "Furnace, " or "Air Handler." Even if the breaker does not look tripped, flip it completely to the "Off" position and then firmly back to "On."
Beyond the electrical panel, there are two physical switches on your HVAC equipment that can cut power to your thermostat:
1. The Furnace Power Switch: Often located right next to your indoor unit, this switch looks exactly like a standard household light switch. It is incredibly common for a homeowner to accidentally flip this switch off while moving storage boxes or holiday decorations.
2. The Blower Door Safety Switch: If you recently changed your air filter, ensure the blower compartment door is completely closed and secured. Modern furnaces feature a safety switch that cuts all low-voltage power to the thermostat if the panel door is even slightly loose.
If you are looking for more comprehensive steps to rule out external equipment issues, check out our handy list of AC Troubleshooting Tips Before Calling a Pro.
Step-by-Step Guide: How to Check Your Thermostat Before Calling for Repair
To make this process as simple as possible, we have broken down the essential self-audit steps into a clear, sequential checklist:
1. Replace the Batteries: Pop off the thermostat cover and replace the existing batteries with fresh, high-quality alkaline or lithium batteries (avoid rechargeable ones, as they do not provide consistent voltage). Ensure they are inserted with the correct polarity.
2. Perform a 15-Minute Power Cycle: For modern digital and smart thermostats, removing the batteries or turning off the breaker for 15 minutes allows the internal capacitors to drain fully. This resets the microprocessor and clears temporary software glitches.
3. Verify the Mode and Settings: Ensure your thermostat is set to the correct mode, "Heat" during our chilly Lower Mainland winters and "Cool" during the summer. Also, check that the fan is set to "Auto" rather than "On" to prevent the blower from running continuously when no heating or cooling is active. For seasonal tips on setting your system efficiently, read our guide on Thermostat Tips for Comfortable Summer Temperatures.
4. Apply the 5-Degree Rule: Manually adjust the target temperature on your display so it is at least 5°F (about 3°C) warmer than the current room temperature (if testing heat) or 5°F cooler (if testing AC). This significant differential forces the thermostat to send a clear demand signal to your HVAC system.
5. Listen and Feel: Wait a few minutes. Most digital systems have built-in anti-short-cycle delays of up to five minutes to protect the compressor. Listen for an audible click from the thermostat, followed by the sound of your indoor blower or outdoor condenser starting up. Walk over to your supply registers to feel if air is actively flowing.
Advanced Diagnostics: How to Check Your Thermostat Before Calling for Repair Using Tools
If you are comfortable with basic DIY tasks, you can use a few simple tools to determine if the issue lies within the thermostat's internal circuitry or the HVAC unit itself.
Safety First: Always turn off the power at your circuit breaker before removing the thermostat faceplate to inspect or touch low-voltage wiring.
• The Multimeter Voltage Test: Set your digital multimeter to measure AC voltage. Gently pull the thermostat body off its wall subbase to expose the wiring terminals. Place one probe on the "R" (or "Rh/Rc") terminal and the other on the "C" (common) terminal. You should see a reading between 20 and 30 volts AC (typically around 24V). If you read 0 volts, the issue is a lack of power from the furnace control board, not a broken thermostat.
• The Terminal Inspection: Visually inspect the small copper wires connected to the terminals (typically labeled R, G, Y, W, and C). Look for loose screws, corroded copper, or frayed wires. If you spot corrosion, you can gently clean the terminals using a pencil eraser or a soft brush.
• The Jumper Wire Test: This classic test safely bypasses the thermostat to see if the heating or cooling system will start on its own. With the power turned off, disconnect the wire from the "R" terminal and the wire from the "W" terminal (for heating) or "Y" terminal (for cooling). Gently twist the bare ends of the R and W (or Y) wires together, or use a small jumper wire to bridge the two terminals. Turn the breaker back on. If your furnace or air conditioner starts up immediately, your HVAC system is perfectly healthy, and your thermostat is the component that needs to be replaced.
Understanding these diagnostic steps can save you from paying for major equipment repairs when a simple control wire fix is all that is required. To learn more about keeping your entire system in peak condition, explore Why Regular HVAC Services Matter.
Comparing Thermostat Types and Placement Factors
The type of thermostat you own, as well as where it is mounted in your home, plays a massive role in its overall accuracy and lifespan. Let's compare the three primary categories of thermostats:
• Manual / Analog — Average Lifespan: 15–20+ Years — Primary Advantages: Highly durable, no software to glitch, simple operation. — Common Troubleshooting Focus: Must be perfectly level to function (if mercury-switch); dust buildup on bimetal coils.
• Programmable — Average Lifespan: 10–12 Years — Primary Advantages: Allows scheduled temperature setbacks; reliable digital display. — Common Troubleshooting Focus: Accidental permanent "Hold" overrides; battery failure; corrupted program schedules.
• Smart / Wi-Fi — Average Lifespan: 8–10 Years — Primary Advantages: Remote smartphone control; energy-saving reports; automatic learning. — Common Troubleshooting Focus: Wi-Fi connectivity drops; router compatibility; C-wire power requirements; firmware glitches.
Beyond the technology itself, physical placement can severely bias your thermostat's readings. This is known as "location bias." If your thermostat is mounted in direct sunlight, near drafty windows, or close to heat-producing appliances like ovens or televisions, it will read artificial temperatures. This causes your system to run far longer than necessary, driving up your energy bills.
Furthermore, "mischievous dust bunnies" and household debris can settle inside the thermostat cover over time. When dust coats the bimetal coil of an older thermostat or blocks the thermistor sensor of a digital unit, it creates insulation that delays temperature detection. Cleaning your thermostat's interior gently with compressed air or a very soft brush every six months is a simple way to maintain accuracy.
Properly managing your thermostat's settings, such as turning the temperature down 7°F to 10°F (about 4°C to 5°C) from its normal setting for eight hours a day, can save you up to 10% a year on heating and cooling costs. Taking care of your system ahead of seasonal changes is always a smart move; learn more in our checklist on How to Get Your Home's HVAC Systems Ready for Spring.
Frequently Asked Questions about Thermostat Troubleshooting
How long do home thermostats typically last?
On average, modern digital and smart thermostats last about 10 years. Older manual bimetal or mercury-switch thermostats can easily last 15 to 20 years or more because they have very few moving parts and no computer boards. However, older units suffer from calibration drift over time, meaning they become progressively less accurate and less energy-efficient. Upgrading to a smart thermostat after a decade of use is usually a smart investment that pays for itself in energy savings.
Can a bad thermostat increase my energy bills?
Yes, absolutely. If your thermostat has a sensor drift of just 2°F to 3°F, it can cause your heating or cooling system to run much longer than necessary. Additionally, a malfunctioning thermostat can cause short-cycling, which draws a massive amount of electrical current every time the compressor starts up. Combined with a dirty air filter, which can raise your system's energy use by 5% to 15%, a faulty thermostat is a primary cause of unexpectedly high utility bills.
How do I know if the problem is my thermostat or my furnace?
You can perform the "Fan Only Test" to isolate the issue. Go to your thermostat and switch the fan setting from "Auto" to "On." If you hear your indoor blower fan turn on and start pushing air through your vents, it proves that your thermostat is successfully sending signals to your furnace's control board, and the furnace has electrical power. If the fan works but your home still has no heat when you switch to "Heat" mode, the issue is likely a component failure inside the furnace itself (such as a bad ignitor, flame sensor, or gas valve), and it is time to call a professional technician.
Conclusion
Taking the time to understand how to check your thermostat before calling for repair can save you from unnecessary stress, diagnostic fees, and household discomfort. By running through the basics: checking your batteries, verifying your settings, cleaning out dust, and testing your breakers; you can resolve many common heating and cooling issues in under ten minutes.
If you have completed these troubleshooting steps and your HVAC system still refuses to cooperate, or if you feel uncomfortable handling low-voltage wiring, we are here to help. At Rep-Air Heating And Cooling, we pride ourselves on treating our customers like family and providing customer service. Our highly trained, professional technicians serve homeowners throughout Mission, BC and the surrounding Fraser Valley communities.
Contact us today to schedule your professional air conditioning services or heating maintenance, and let us help you keep your home perfectly comfortable all year round!
hear what our satisfied clients have to say
Neighbourhoods in the Fraser Valley